Device Enrollment is the first and most important step in getting your full fleet compliant across your security controls. It is the unlock to enable you to manage your fleet and get the most out of Zip’s features and functionality.
Read on below for instructions for how to enroll devices and get your fleet compliant!
Sending out Device Enrollment Instructions to your Employees
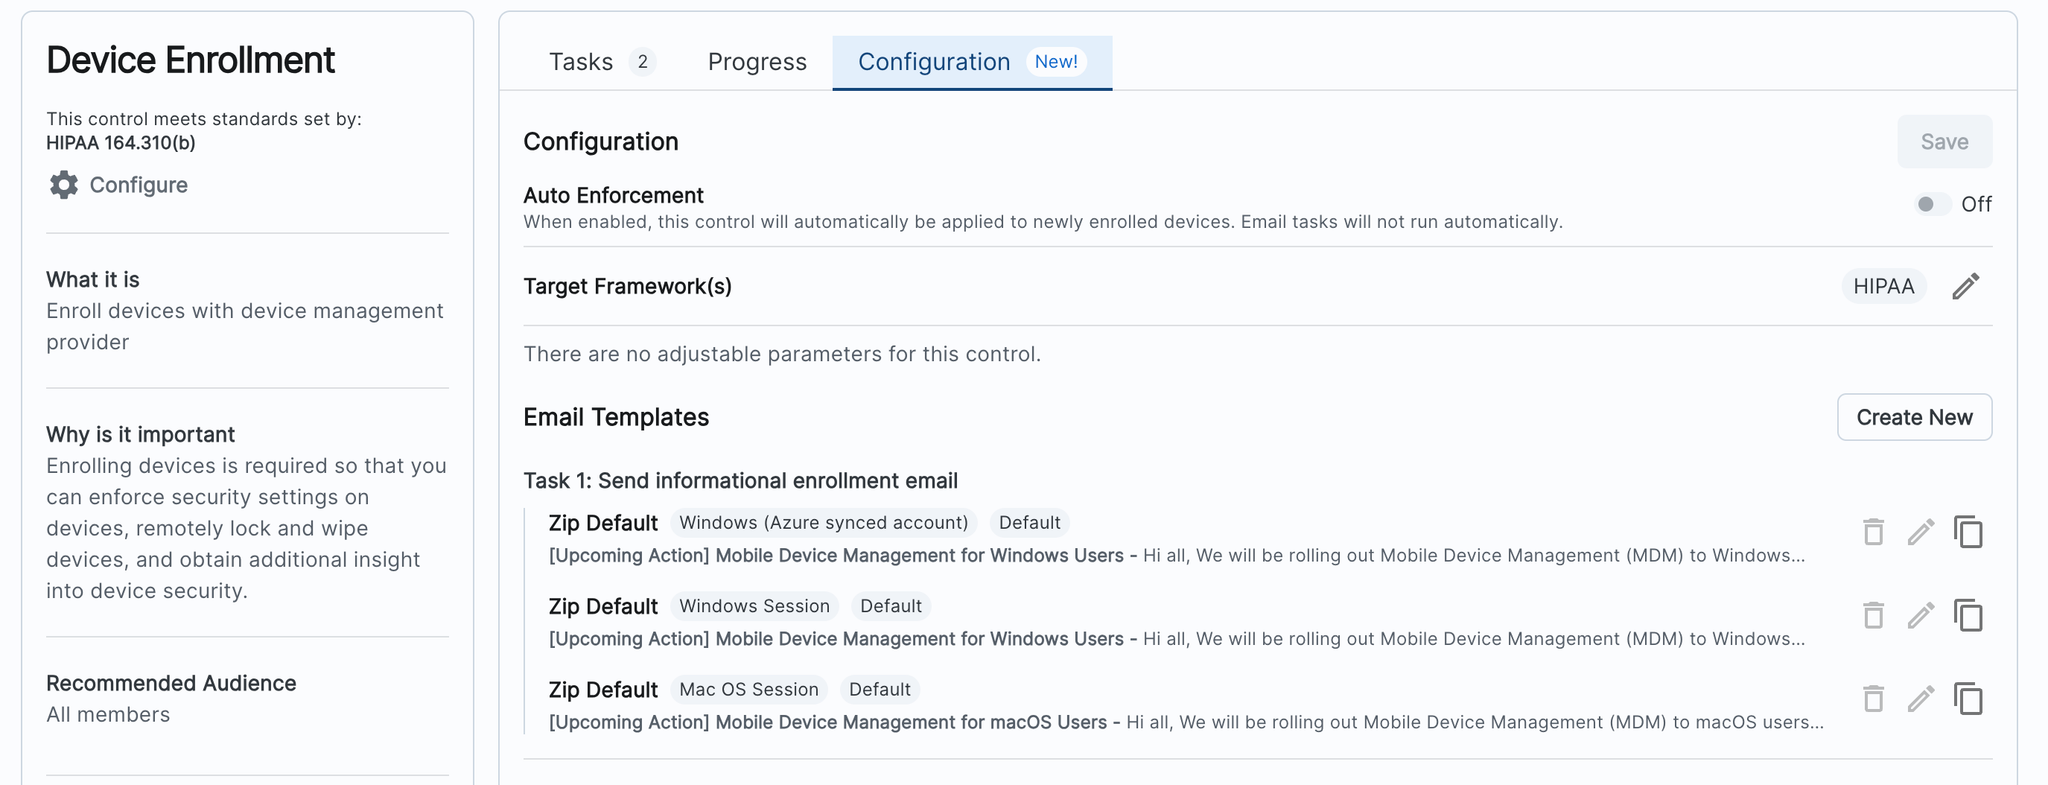
Under the ‘Device Management’ Section, click on the control ‘Device Enrollment’
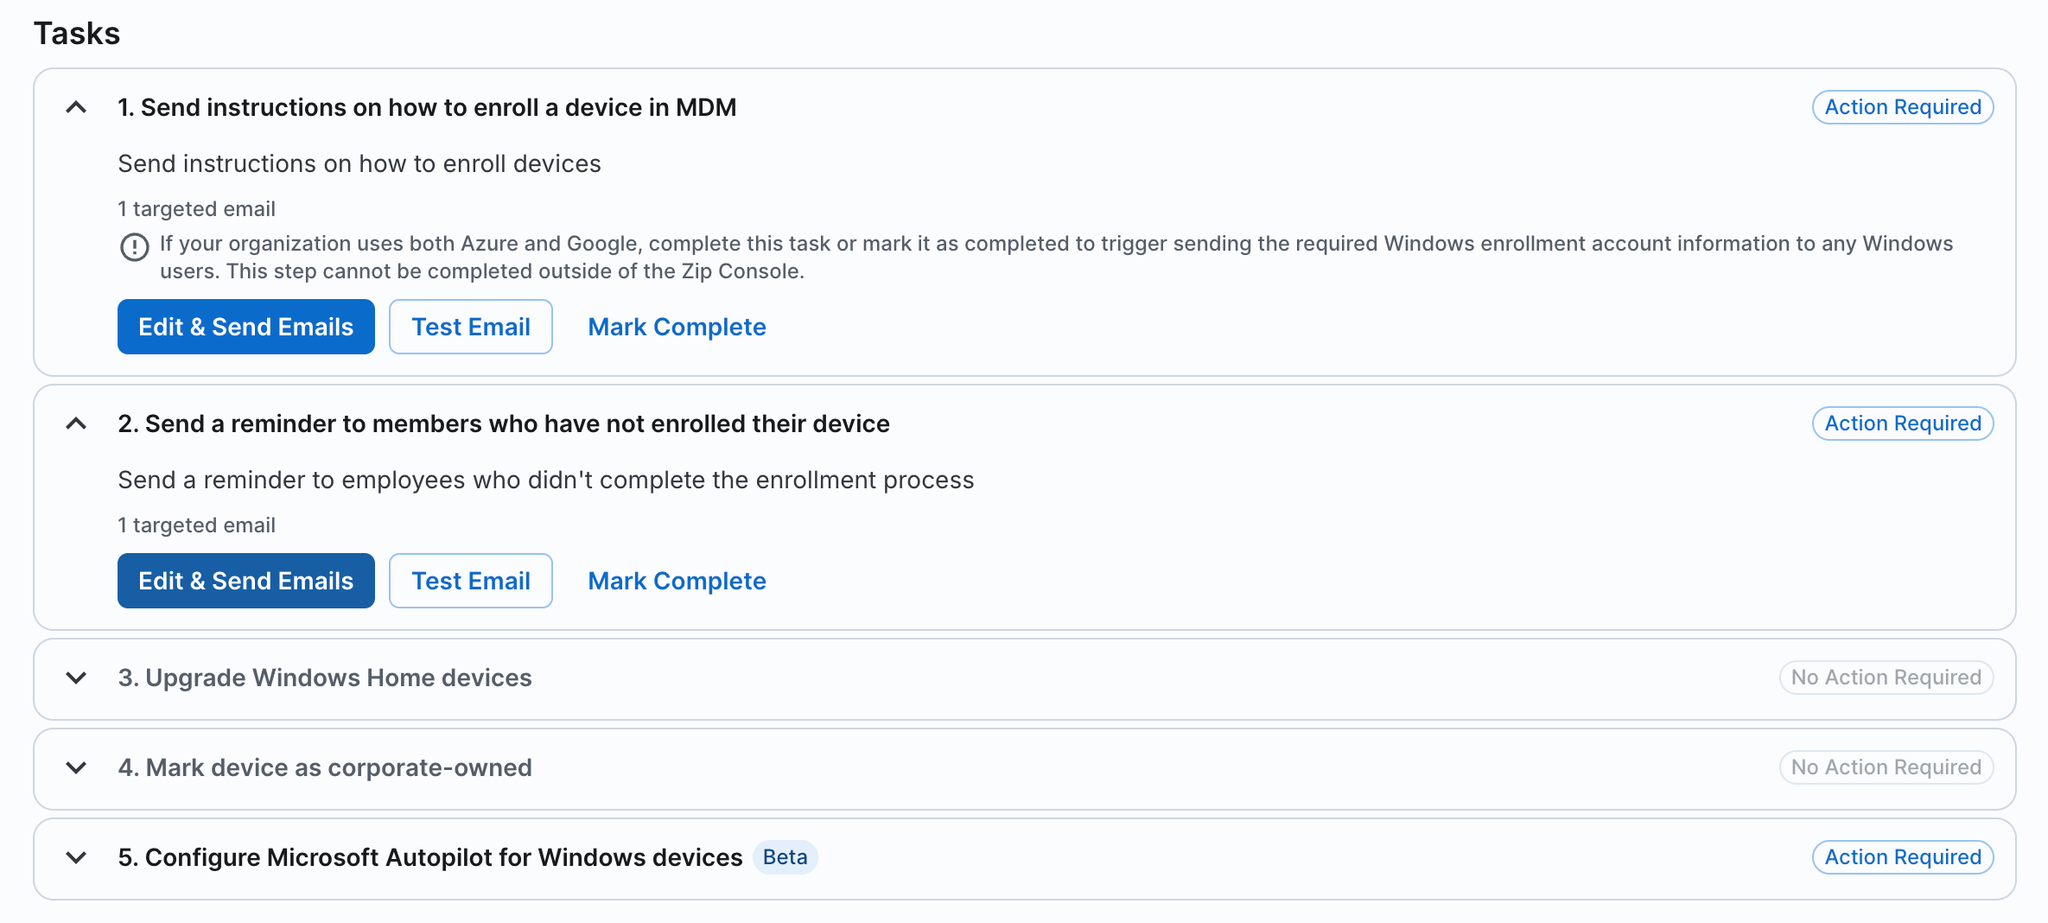
Under the “Tasks” section, follow the tasks outlined to send instructions for device enrollment to your employees:
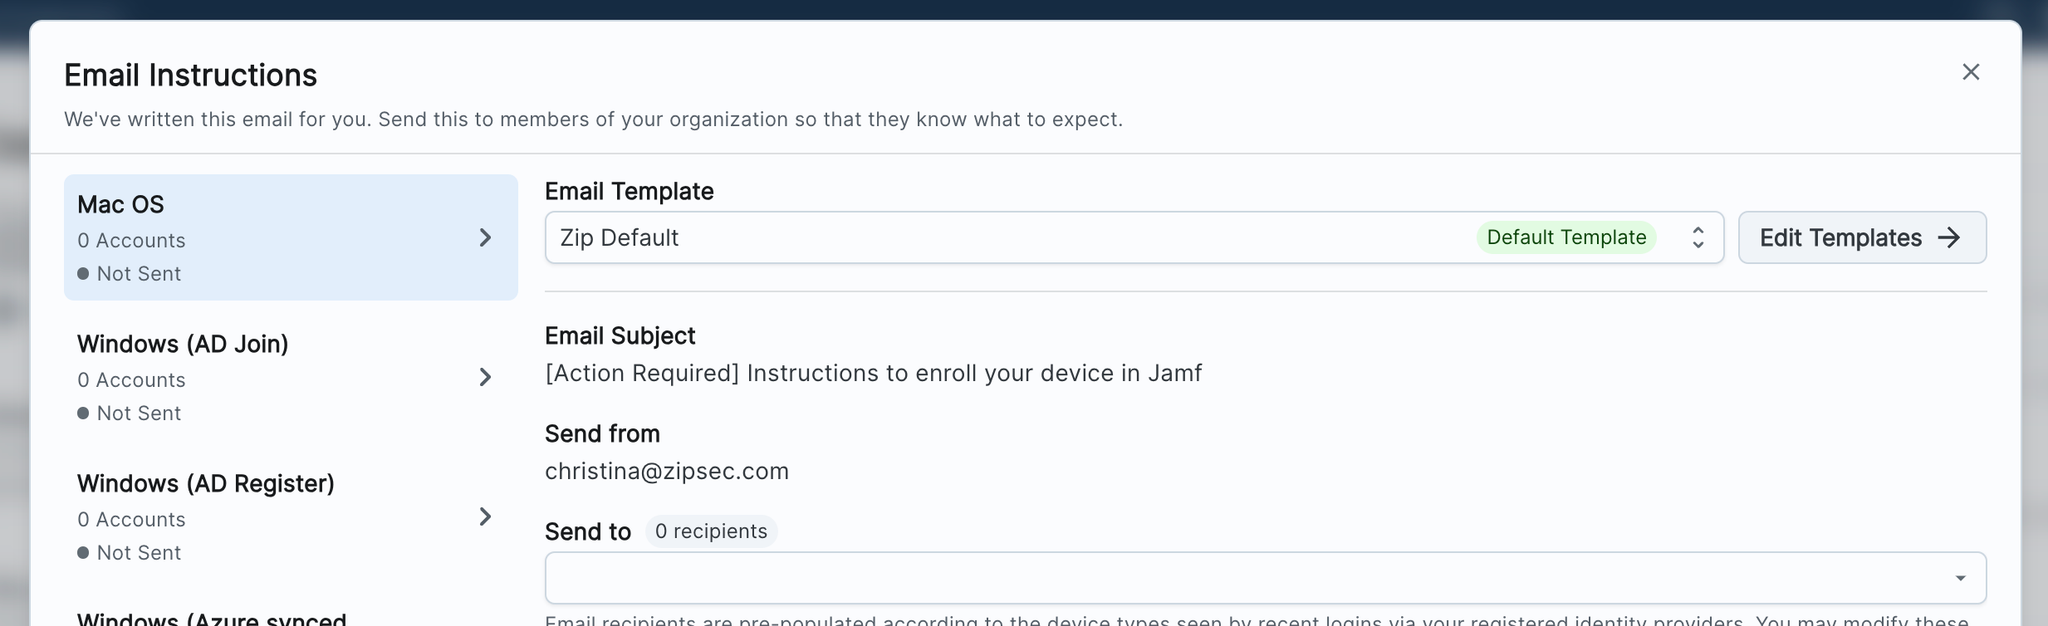
Under the ‘Tasks’ section, follow the steps to send email instructions for device enrollment to your employees. Click into each task to review the email comms, and confirm who will receive the email.
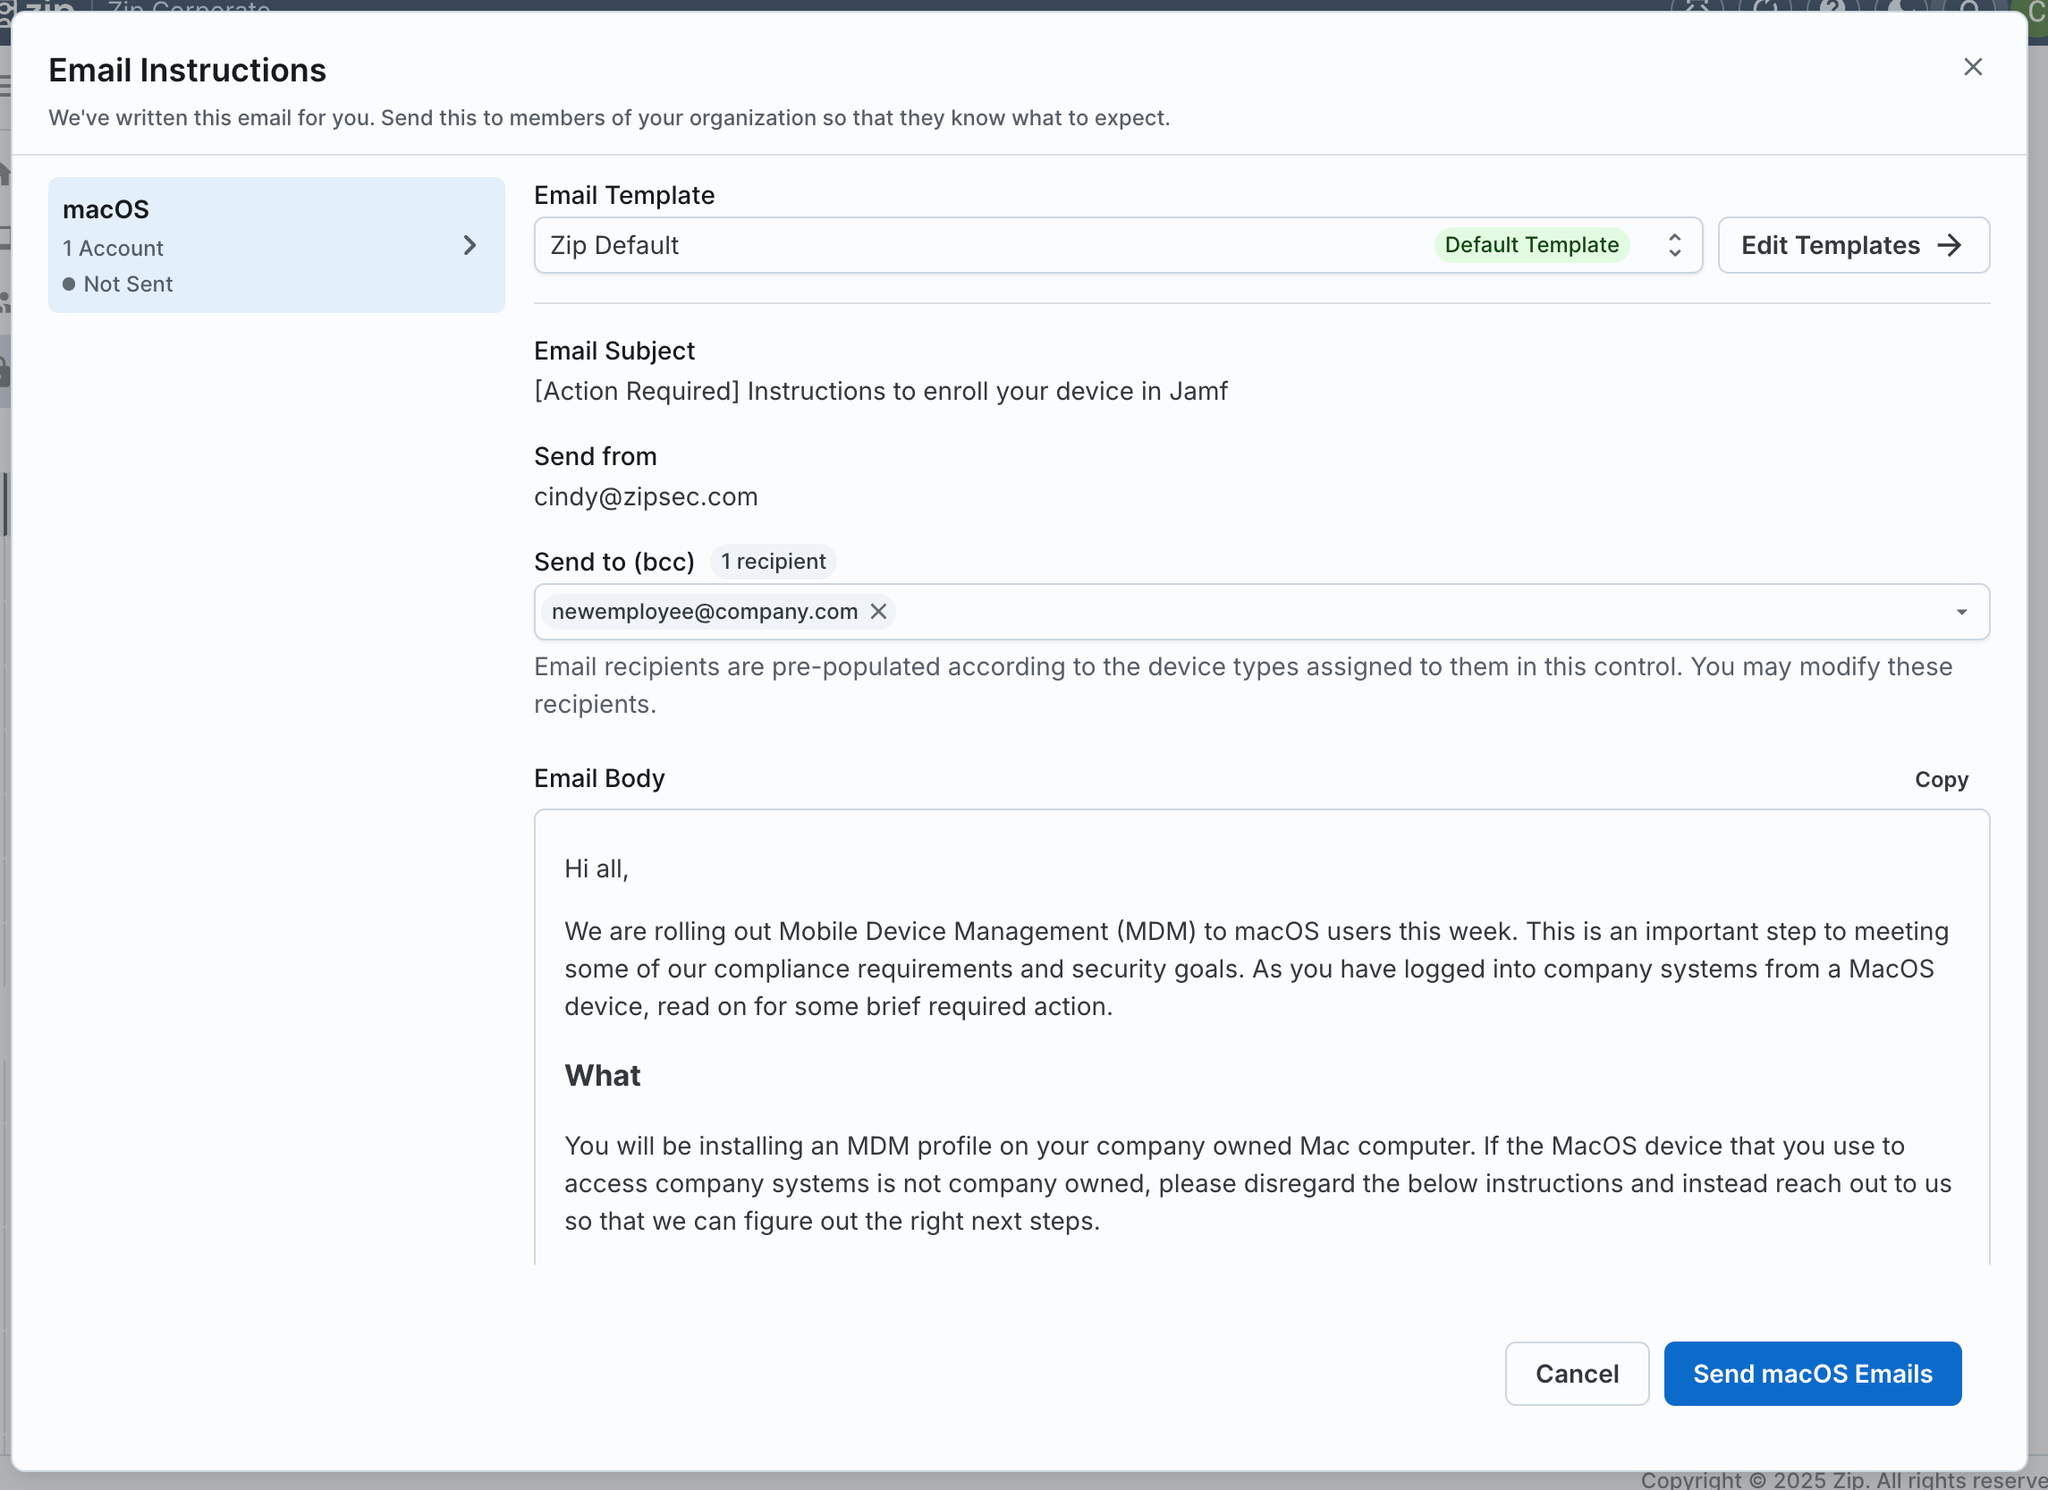
You will see there may be multiple email options to send, for macOS and Windows device enrollment. Toggle between the tabs on the left hand side to view each email.
Important Note: The “Send to” recipients for each email are pre-populated with all email addresses of unenrolled devices automatically, but this too can be edited by adding or removing email addresses.
Review the email content, subject, and recipients. If you would like to change anything, you can make edits by clicking Edit Templates and creating a new template.
Hit ‘Send’ in the bottom right hand corner to send the emails. This will only send the currently selected email type. Repeat this for all required email types.
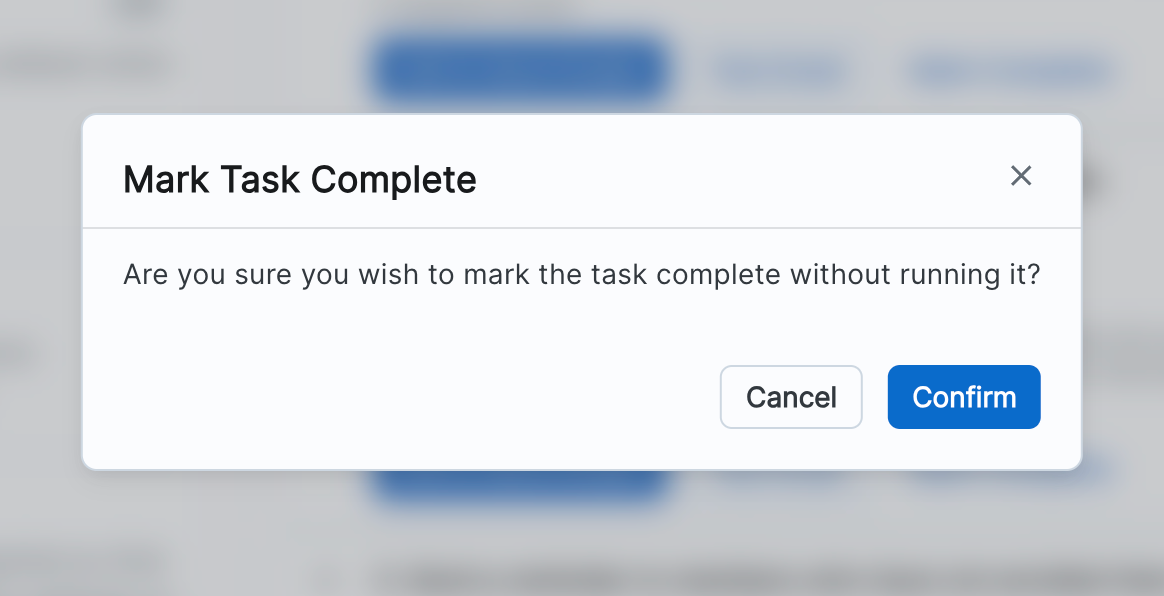
Helpful tip! You have the option to skip sending out emails for each task by selecting the ‘Mark Complete’ button:
The Send instructions on how to enroll a device in MDM email contains the instructions for device enrollment, so unless this information is being shared any other way, you must send this email in order to get users to enroll their devices. Generally, we recommend you send this one!
Tracking Device Enrollment
There are several ways to see the percentage of devices enrolled, but the simplest way is via the overview dashboard and Device Enrollment control.
Here you’ll see an overview of how all your controls are performing.
Click ‘Device Enrollment’
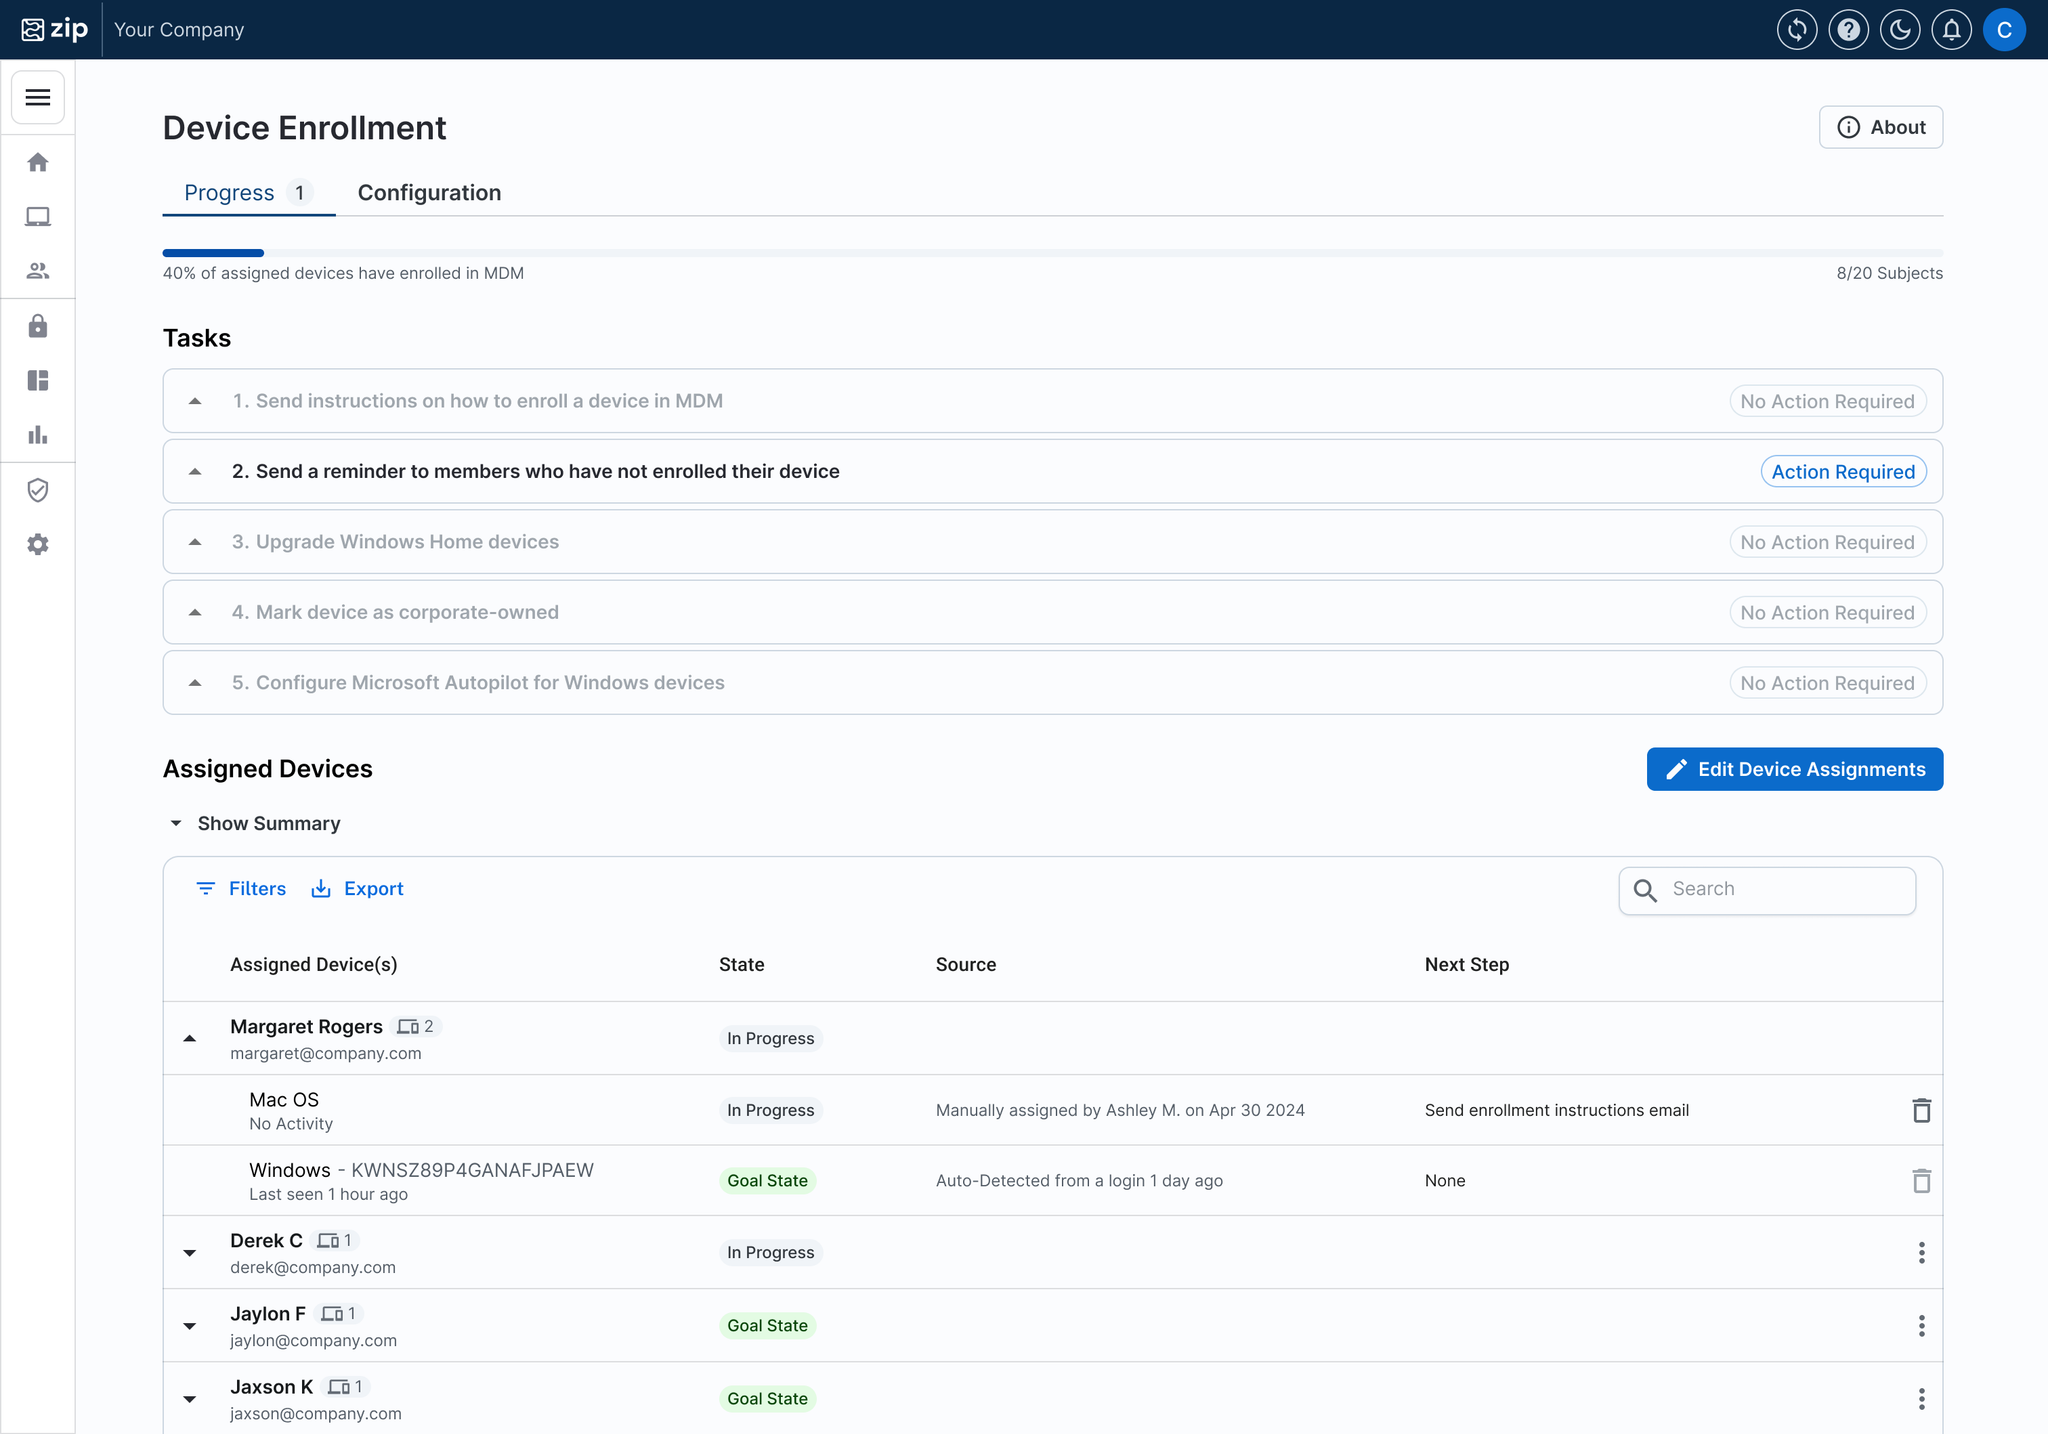
On the ‘Progress’ tab, scroll down to Assigned Devices.
Here you will see each member in your organization and whether they
Have their device(s) enrolled (Goal State): These are in the goal state and no action is needed
Have devices assigned but not yet enrolled (In Progress): Devices can be assigned automatically if Zip detects the user’s sessions from an unenrolled device or if they are part of Account Syncing and have not yet enrolled their Windows device. You can also manually assign a device if the Zip console is not automatically assigning it by clicking “Edit Device Assignments”. The next step here is to send enrollment communications.
Have no devices assigned (No devices assigned): These members have no auto-detected devices or manually assigned devices. This means you do not expect them to enroll a device, and they will not count against your enrollment compliance progress.
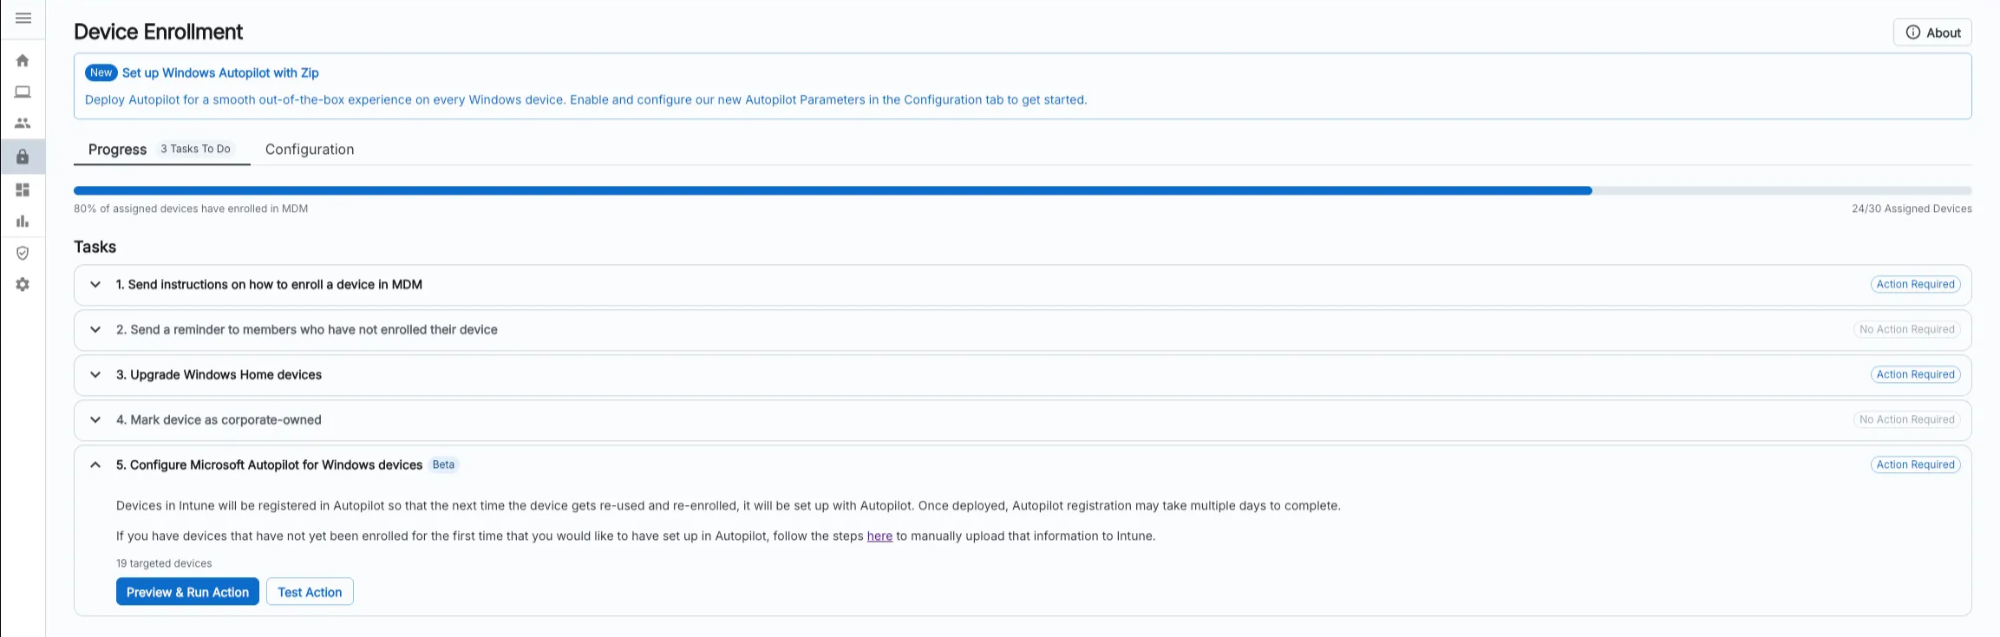
The Device Enrollment Control with Tasks and the Assigned Devices progress tracker
Updating Device Assignment
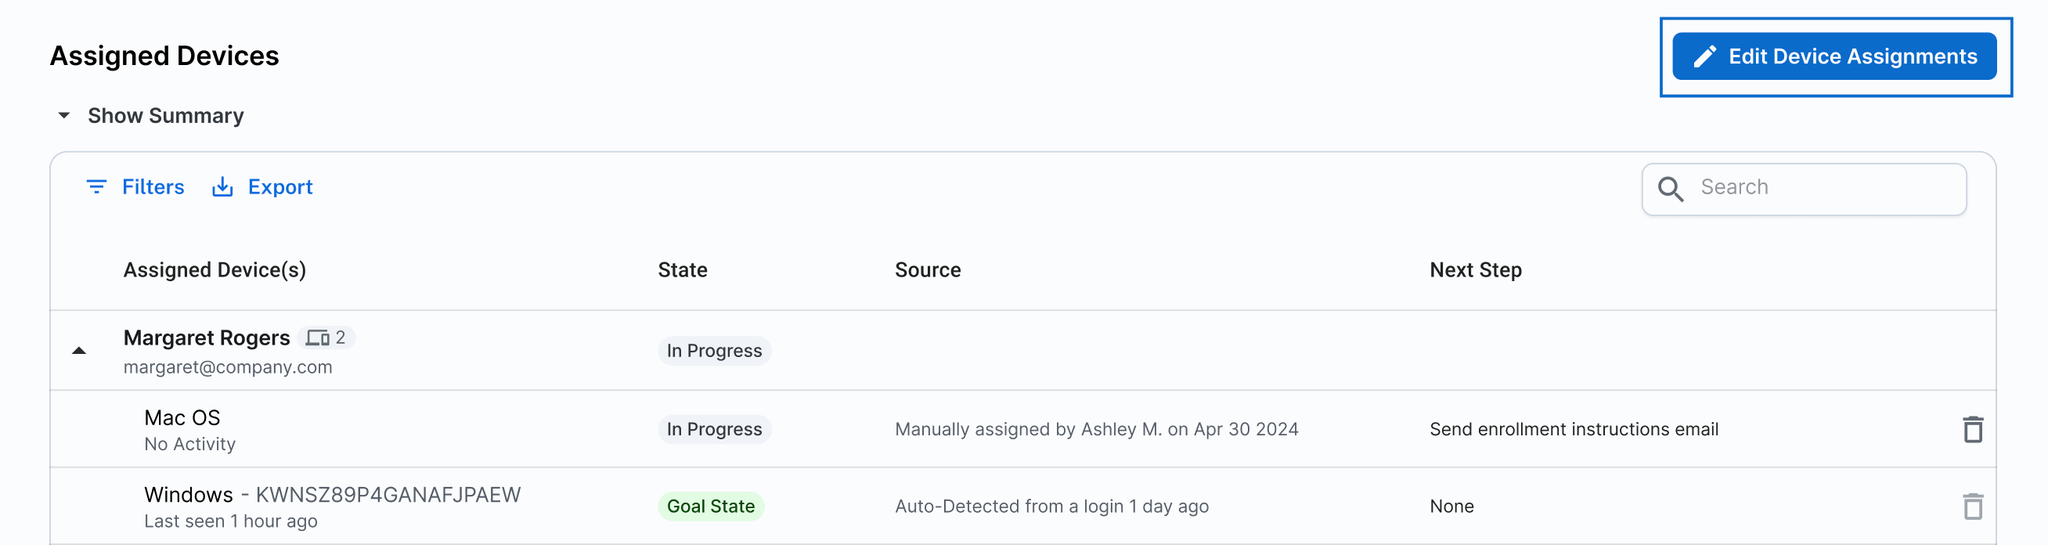
You have the ability to edit device assignments in the Device Enrollment control, which means you can overwrite the predictions the Zip console generates on which users have which work devices, to more accurately reflect reality.
Scroll down to the Assigned Devices table. On the right hand side, select ‘Edit Device Assignments’
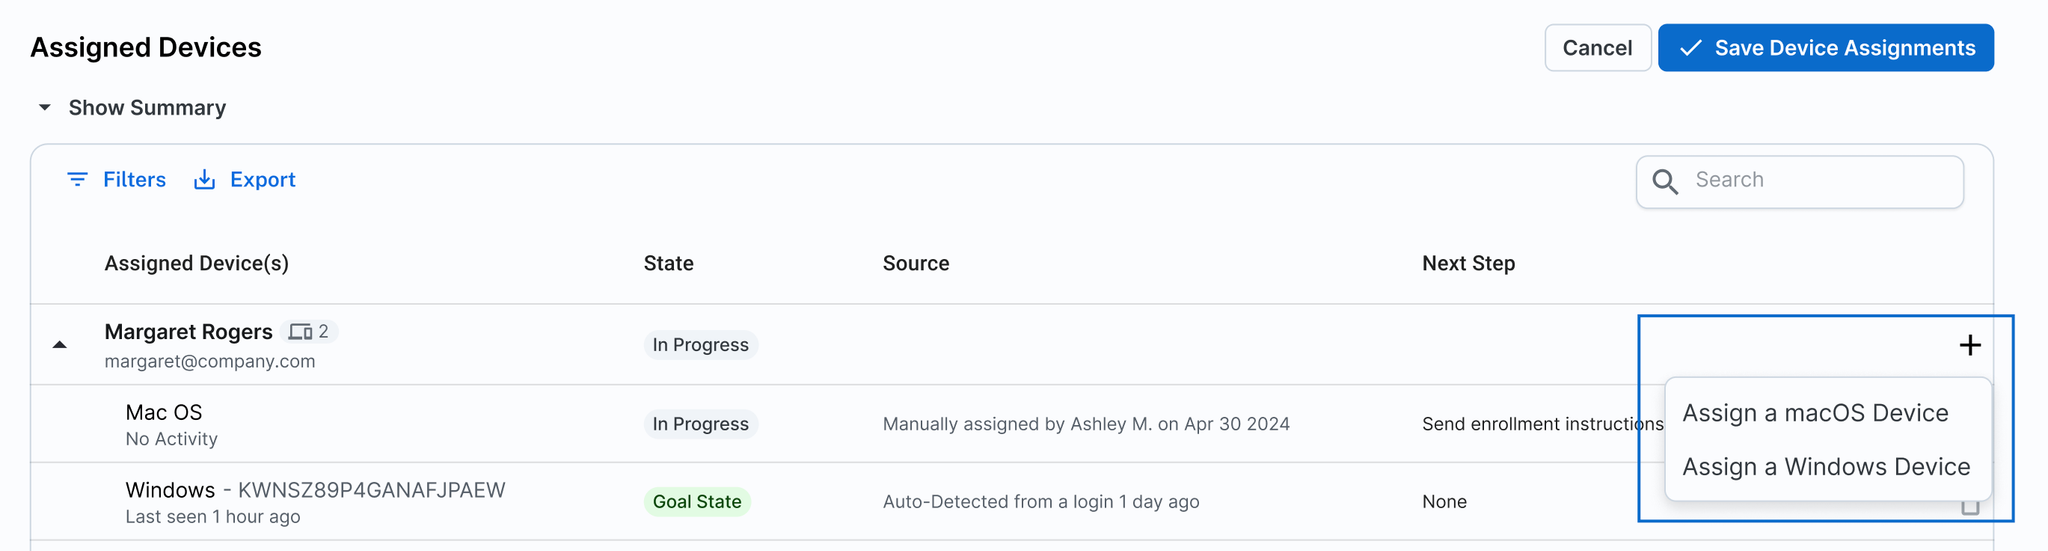
To add a new device to a user: Clicking the “+” button next to the user and select the device type you expect that user to have.
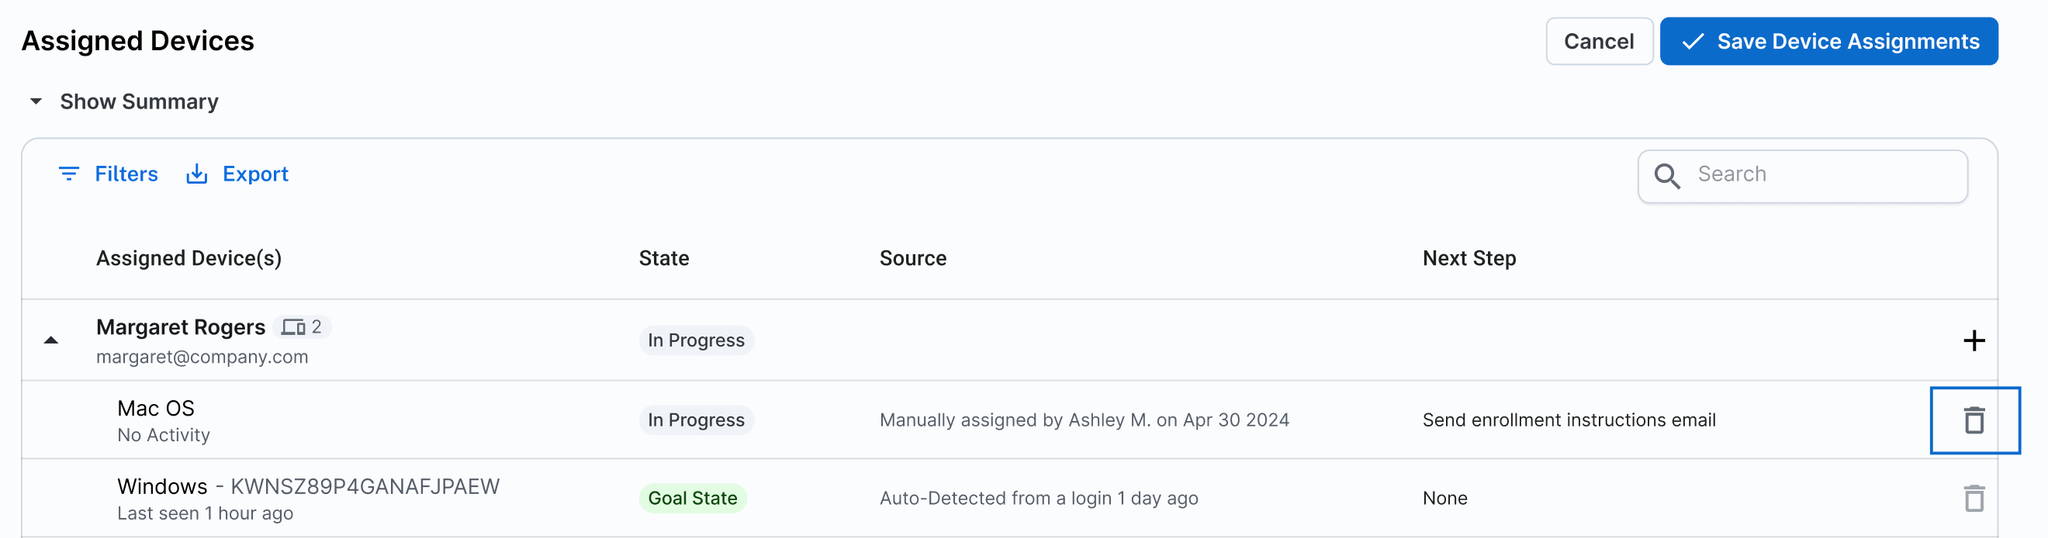
To delete an existing device assignment: Click the trash button next to the device.
Important: Click ‘Save Device Assignments’ in the top right hand corner to make sure your changes are saved. Once saved, your enrollment progress will reflect the newly updated assignments.
Sending Reminders to Unenrolled Devices
Navigate to ‘Tasks’ at the top of the Progress tab.
Select task 3 ‘Send a reminder to members who have not enrolled their device’
Follow the steps as above to send a reminder email to employees who still need to enroll their devices.
💡
Device Enrollment is the most essential first step in getting your security strategy up and running, so it’s important to have a strong campaign to get to 100% device enrollment. Make sure you send reminders via email, and additionally if there are other ways to get people’s attention (such as Slack, or announcements in a team meeting), this can help as well.
We’ll be on hand to support with any questions or issues that arise!
Getting Your Fleet Compliant
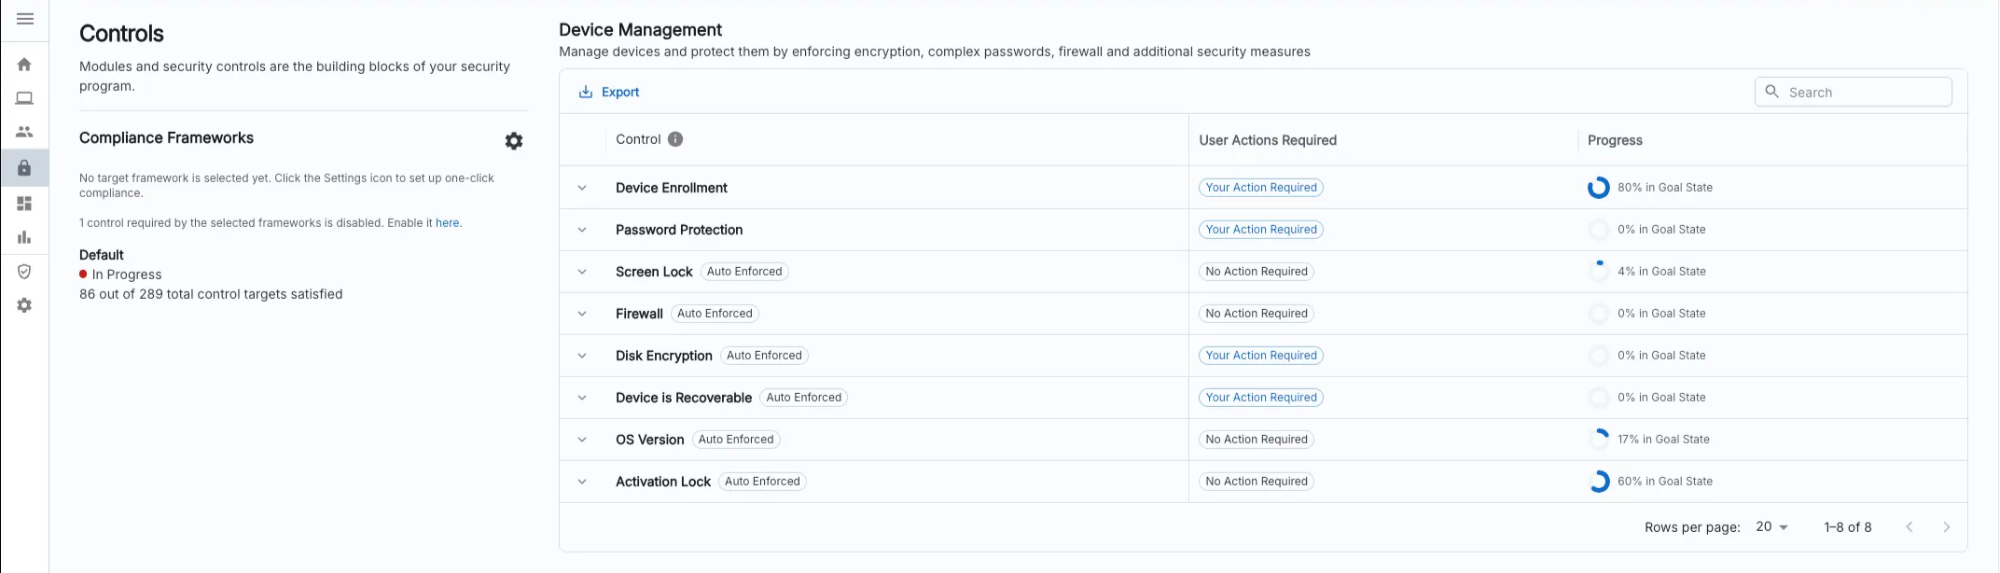
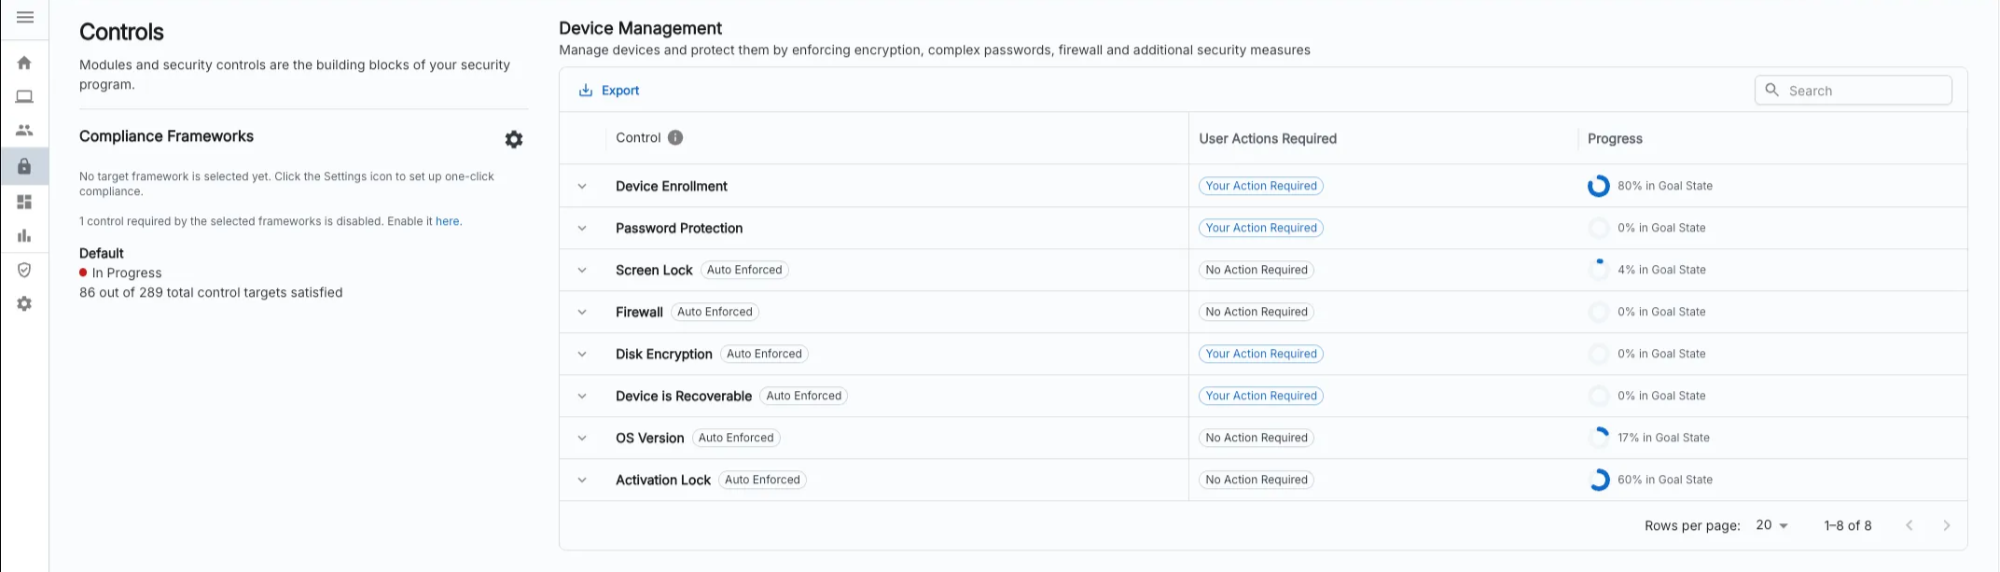
Once a device is enrolled, you be able to look at the devices and see all the controls they are compliant and non-complaint for, and take action to get them fully compliant.
Depending on the configuration of controls and Compliance Frameworks you set up for your organization, you will see the compliance status for each enabled control.
If you’d like to set or change these, refer to our instruction pages:
As devices enroll, most devices will become compliant automatically to each control, however for some there may be actions to take to get to a compliant state. You can click into each control and review the ‘Next Step’ column to see what action needs to be taken.
Some helpful tips:
Some controls require users to log in / log out for them to be compliant (e.g. disk encryption). This will likely happen within 1-2 days, but you can also nudge users to do this, to get them compliant.
Some controls require devices to ‘check in’ in order to be compliant (e.g. CrowdStrike Falcon being installed). This should happen next time a device connects to the internet.
Windows Autopilot in the Zip Console
The Zip Console now includes Beta support for configuring Windows Autopilot for Windows devices across your fleet. Read on to learn how to set this up!
Note that devices are still compliant with the Device Enrollment control if they are not registered with Windows Autopilot. Windows Autopilot automatically configures Windows computers during their initial setup with all the necessary company settings, apps, and security policies, so when registered devices are set up for new employees, they can start working immediately without waiting for IT to manually set up their device.
Configuring Windows Autopilot Parameters
From the Zip Console’s homepage, navigate to the ‘Controls’ tab.
Navigate to the ‘Device Enrollment’ control under ‘Device Management’.
In the ‘Device Enrollment’ control, navigate to ‘Configuration’.
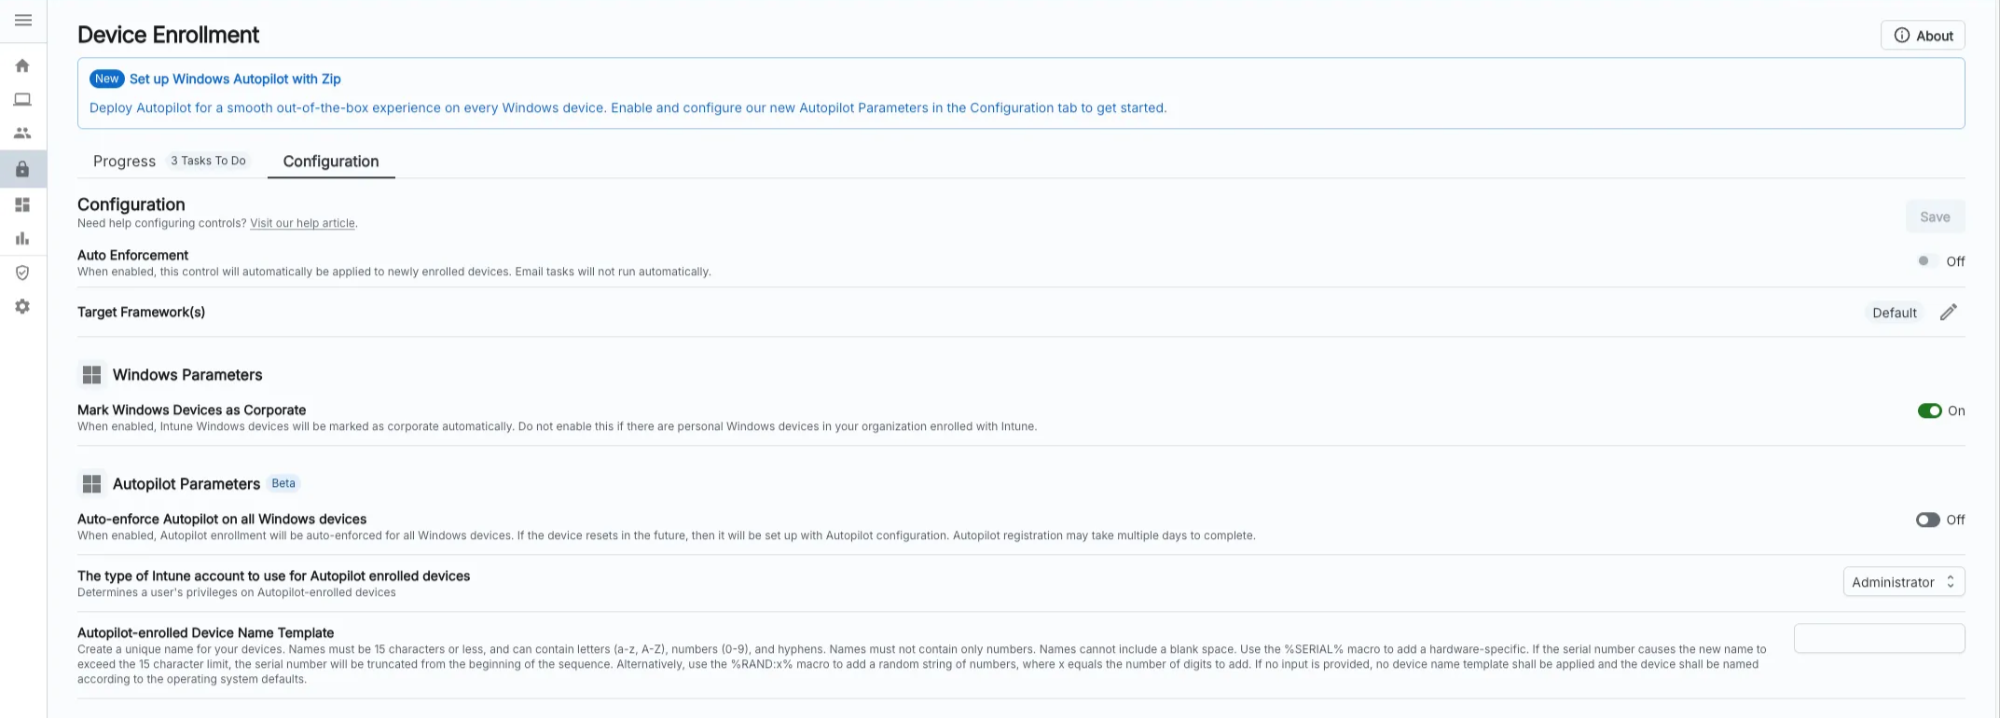
Underneath ‘Autopilot Parameters’, you will see the Autopilot settings the Zip Console currently supports configuring:
Auto-enforce Autopilot on all Windows Devices
If set, all eligible Windows devices will be registered with Windows Autopilot through the Zip Console.
If not set, only eligible Windows devices selected by you in the Autopilot task (described below) will be registered with Windows Autopilot through the Zip Console.
b. Granted Windows Permissions
This represents the user account level for Windows devices that get Autopilot set up through the Zip Console. Options are Standard or Administrator.
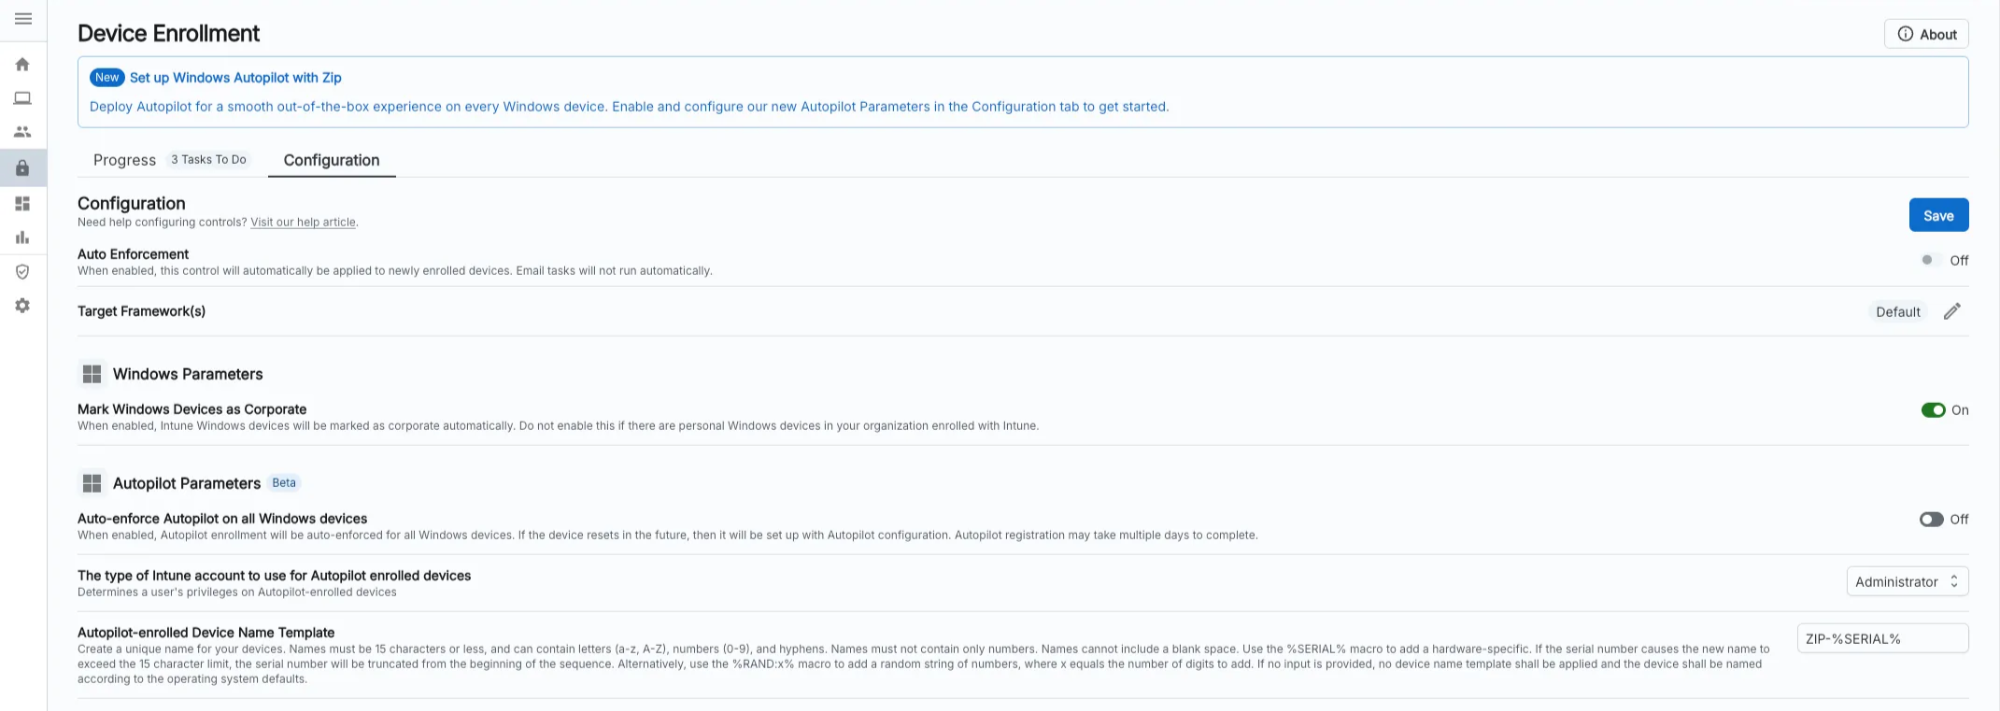
This is an optional Windows device name pattern that you may provide for your devices that are enrolled in Windows Autopilot through the Zip console. If no value is provided, the default auto-generated Windows device naming convention is used.
After setting your desired parameters in step 4, click ‘Save’.
6. At this point, if you selected to auto-enforce Autopilot, then you have now set up Autopilot for all your managed Windows devices in your fleet. Otherwise, proceed to select the devices you would like to register outlined in Running the Windows Autopilot Task.
Running the Windows Autopilot Task
Prerequisite: Your device fleet has at least one Intune-enrolled corporate Windows device. If there are no enrolled devices, then the button to run the task will be disabled.
From the Zip Console’s homepage, navigate to the ‘Controls’ tab.
Navigate to the ‘Device Enrollment’ control under ‘Device Management’.
Underneath ‘Tasks’, expand ‘Configure Microsoft Autopilot for Windows Devices’.
Select ‘Preview & Run Action to configure Autopilot for all eligible Windows devices in your fleet. Alternatively, you can select ‘Test Action’ to select a subset of eligible devices to test configure Autopilot for.
At this point, Autopilot has been set up for your selected devices.
Disabling Windows Autopilot
If you need to disable or remove the Intune configuration that the Zip Console created when configuring Windows Autopilot through the Zip Console, you can choose to:
Navigate to your Intune console and manually delete the Autopilot Deployment Profile titled "Windows PC Autopilot Deployment Profile Automatically Set by Zip Security" and the Enrollment Status Page Entry titled "Zip Security: Windows Autopilot Enrollment Status Page Profile".
When deleting the Deployment profile, you will first need to un-assign the device group assigned to it.
FAQs
A user is using a Windows Home device, how can they enroll their device?
Windows Home devices are not supported in our standard enrollment process. If you require a device to be managed that is a home device, we recommend upgrading to Windows Pro which will allow the device to be fully managed.
Some of my employees are using their personal devices, should they still enroll in the MDM?
This is a decision that needs to be made by your organization. Enrolling in your MDM is the key mechanism to deploy security controls, and may be a requirement to meet compliance standards. However, some organizations and employees may not be comfortable enforcing this level of control over a personal device.
If you wish for employees to enroll their personal devices to the MDM, the exact same enrollment process applies as with a work-issued device, so you can simply follow the instructions above! If the personal device is enrolled in Intune, however, make sure to edit the configuration that automatically marks Intune Windows devices as corporate-owned devices. In the Device Enrollment control go to the ‘Configuration’ tab, toggle off the setting ‘Mark Windows Devices as Corporate', and click save. You will still be able to mark devices as corporate-owned as needed using a task in the control, but you’ll also be able to have personal Windows devices in Intune now.
Can I see devices that aren’t enrolled in the MDM yet?
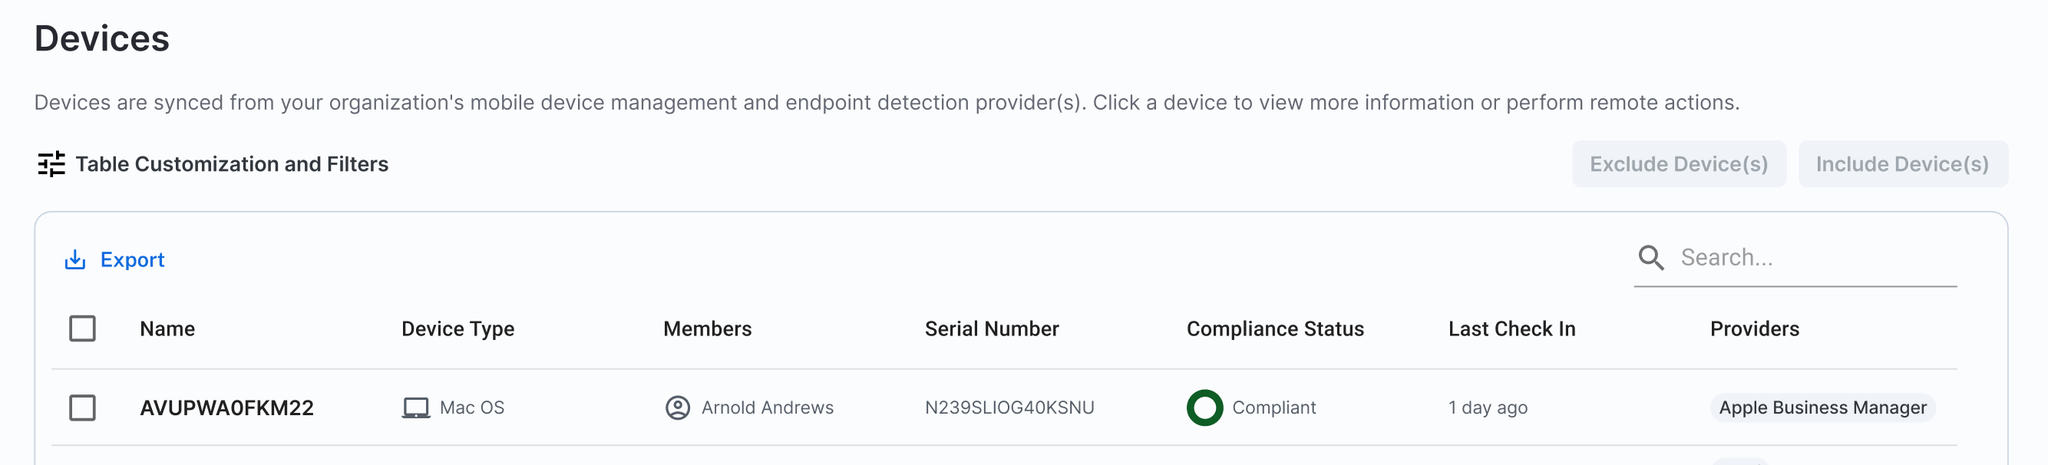
For Apple devices, we have introduced a new way to view Apple Business Manager devices that aren’t yet MDM enrolled. In the Zip console, on the sidebar navigate to ‘inventory’ —> ‘devices’
Under the ‘provider’ column, any device showing as ‘Apple Business Manager’ indicates an Apple device that has not be enrolled in your MDM yet.
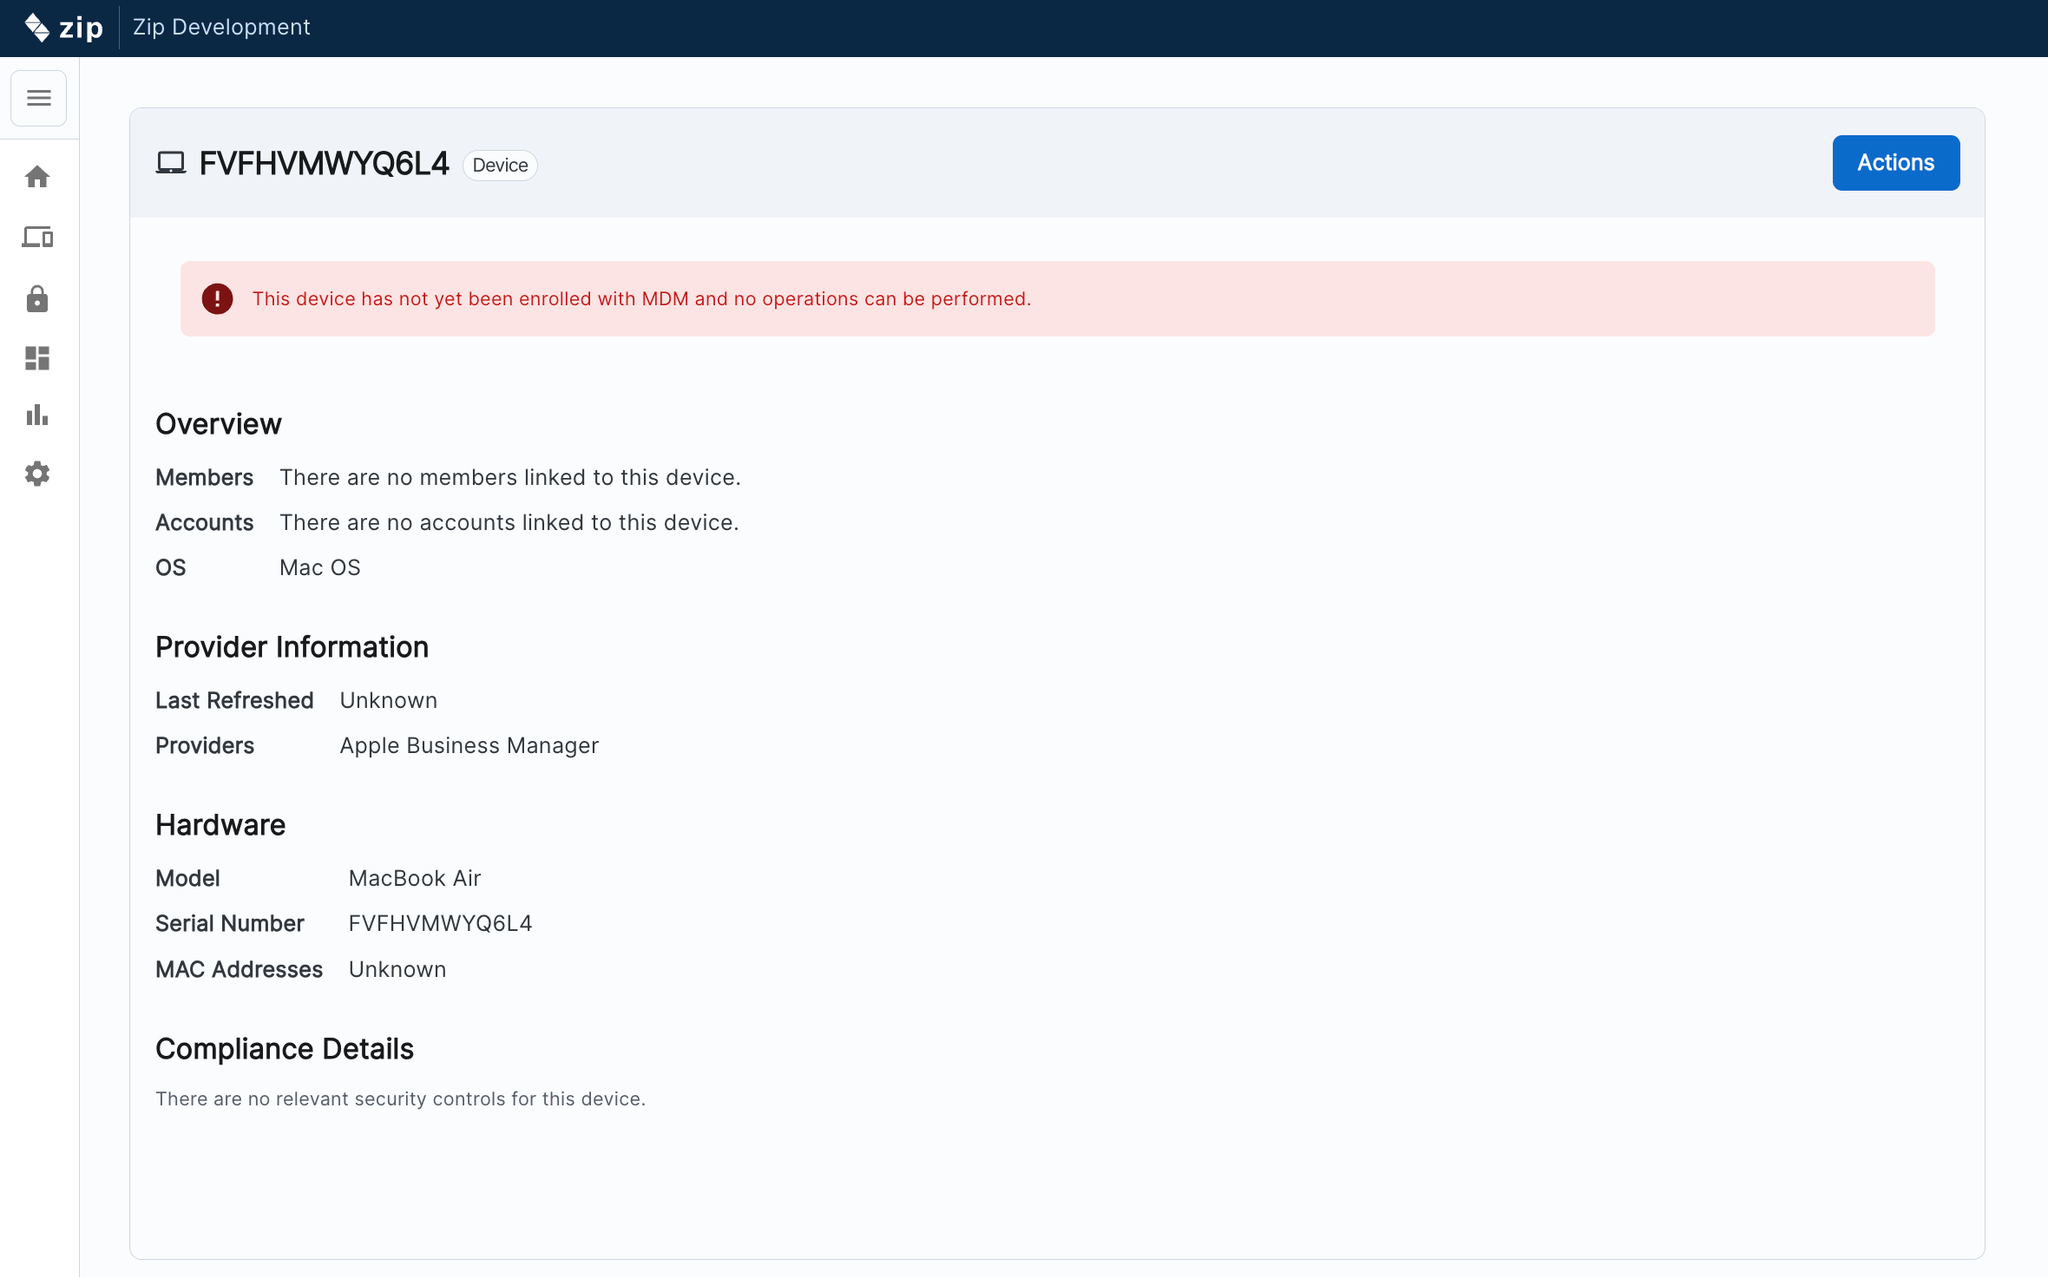
You can click into the device to learn more about it:
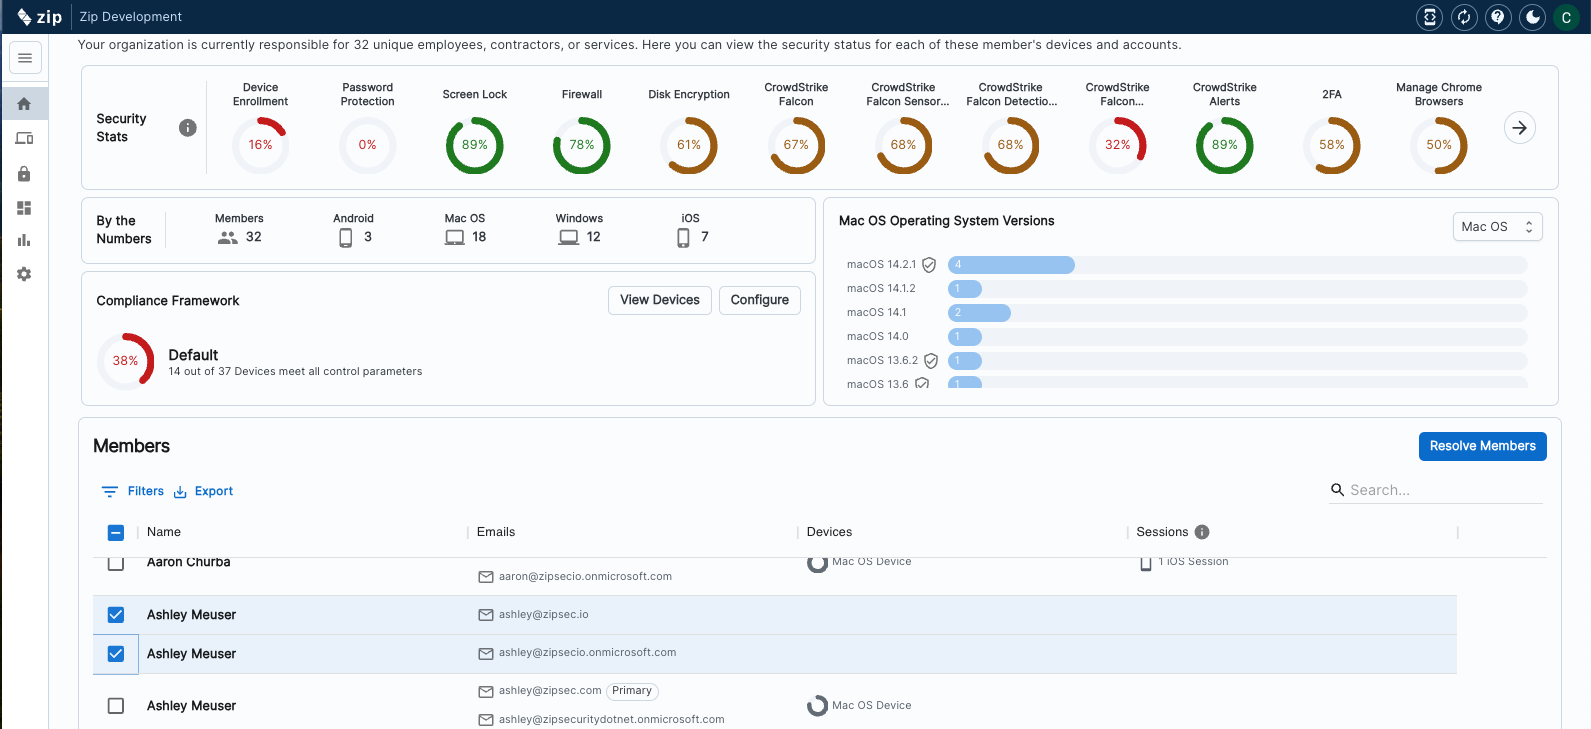
Resolving Members: I have users with multiple email accounts who are showing up as multiple members: how can I combine them?
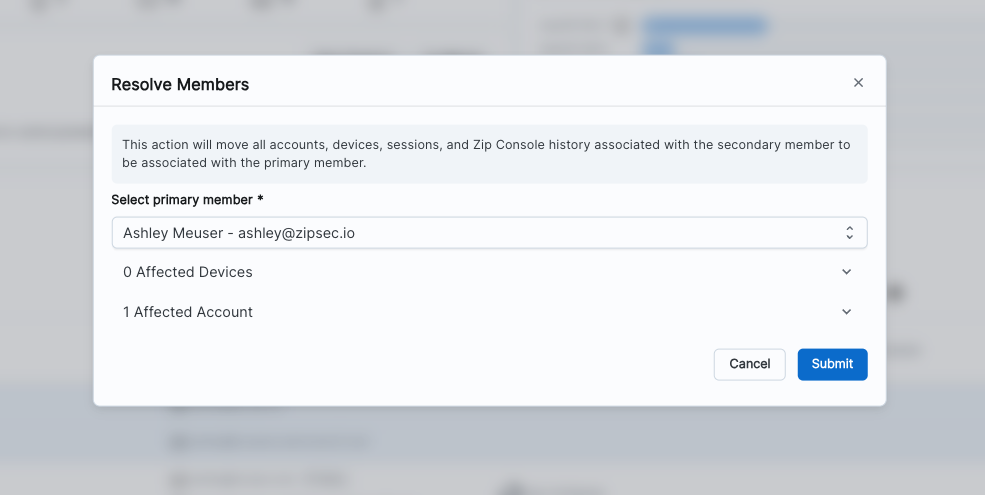
We have built a feature to ‘resolve members’ which allows you to combine multiple email accounts into a single record so it can more accurately reflect the number of members of your organization, and give a more accurate representation of how you’re tracking with enrollment and compliance.
Click into each task to review the email comms, and confirm who will receive the email.
If you would like to edit a template, select the ‘edit button’
Here you can go in and make edits as required.
You can either clone an existing template and edit it, or create a brand new template from scratch.
You will see in the screenshot above, once you’ve created and saved a new email template, you will be able to select it from the dropdown when you are getting ready to send an email.
What happens if I already have a exiting Autopilot configuration for my organization’s managed Windows devices and then configure Autopilot using the Zip console?
If Autopilot is already configured for a device and then re-configured with Zip, then the oldest configuration, likely the one made outside of Zip is what will apply to the device.